Showing posts with label studs. Show all posts

Friday, October 11, 2013

DIY: classy mini wallet-clutch!


Except my passion for jewelry, I must admit I am also a wallet addict! For the days that you want to go shopping without carrying a bag that is heavy and not practical, the mini clutch that I will show you, will give you style and comfort. You can carry your phone, your keys and only the absolute necessary things that you need. Follow the simple instructions to make your own now!!

Pic 1
You will need:
Fake leather fabric
Studs, tassels
Scissors
Paper
Ruler 
Picture 2


Picture 3
Pic 2-3
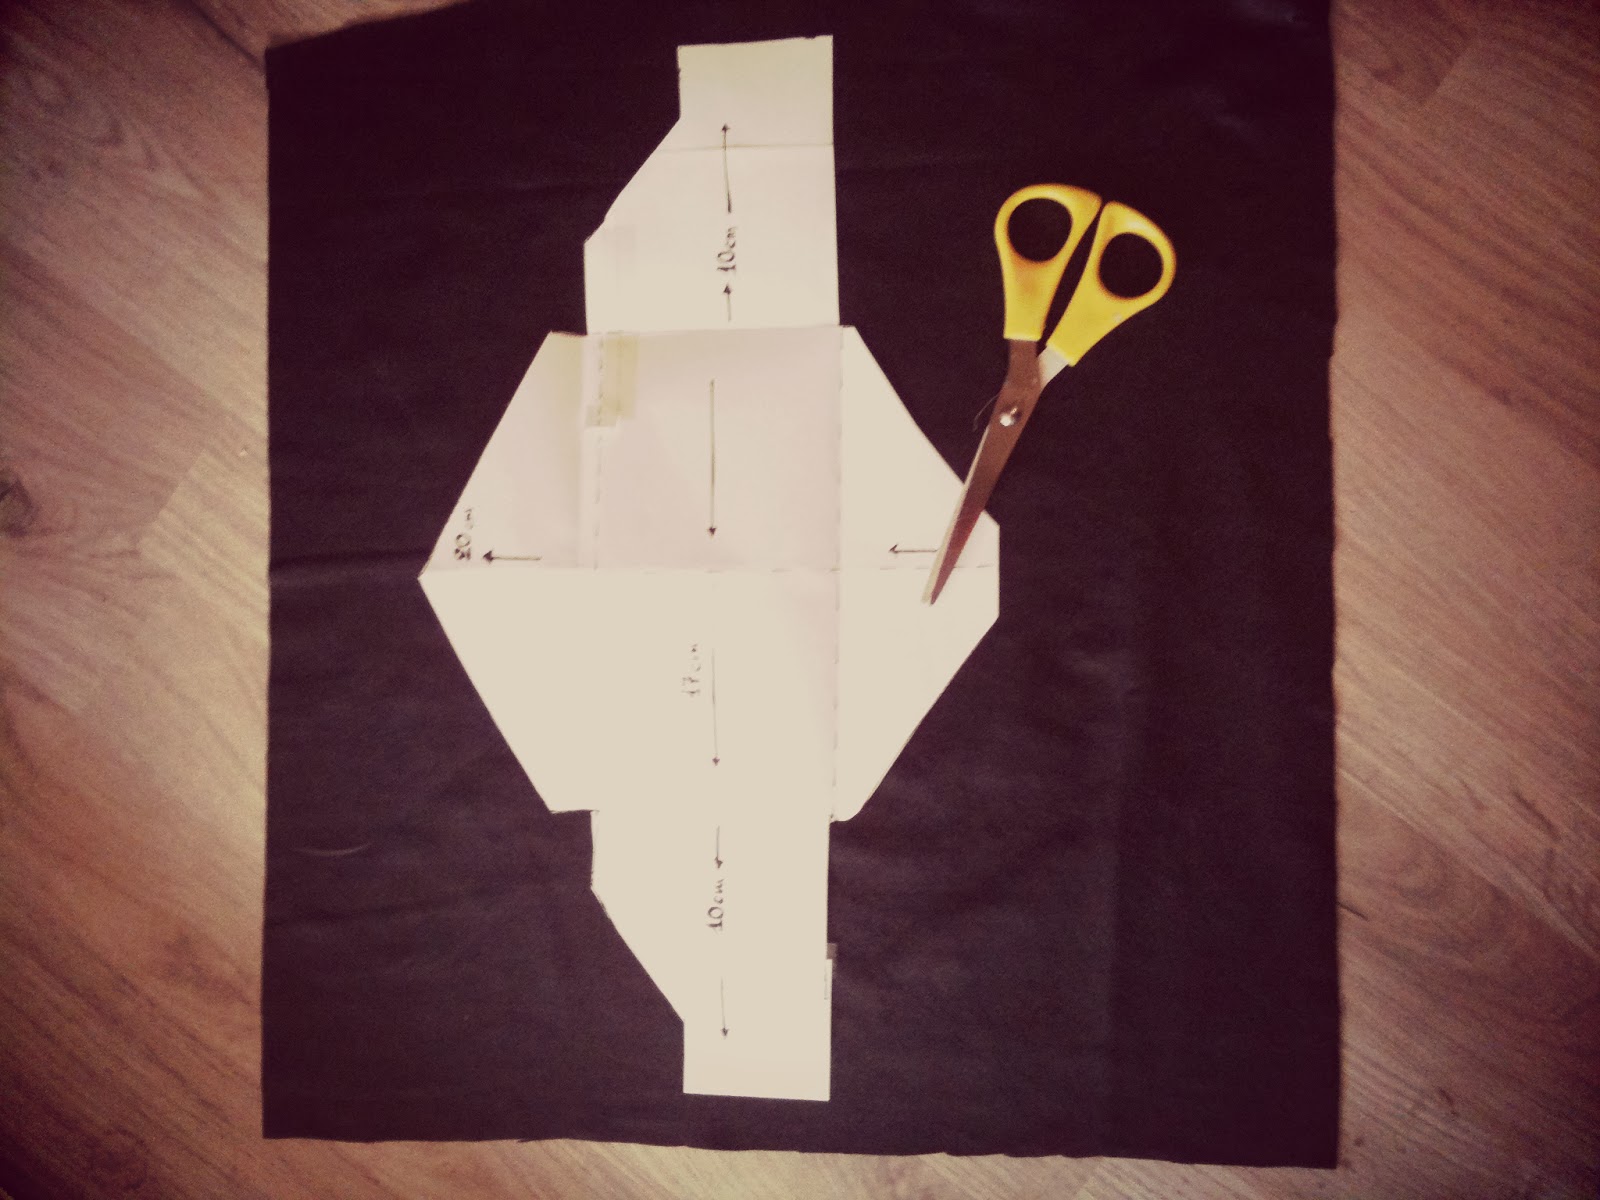
Take a paper and start by making your pattern. The idea is a basic envelope. Measure with your ruler the distance of every point and you will create an open paper envelope. Wrap it to check if the shape is OK.
Picture 4
Picture 5
Pic 4-5
Place the fabric on a steady surface and start cutting the shape of the pattern

Picture 6
Pic 6
Now starts the fun part. With the studs and pliers start decorating your wallet .Close the central button-stud with pliers and if you want you can add some fabric glue in the inner joints.


Pic 7
Ready! I have made also another one with the same technique and pattern. If you want to make them bigger you can just adjust the size of the pattern in a bigger scale! Super easy and fun this wallet is everything you need for a relaxed shopping day!

xxx
MikaLina

Monday, April 22, 2013

Boring shirt...No more!


Although it’s not a new idea, I couldn't help but to try it out. I came across an old shirt (men's shirt) and I found my perfect canvas to try this technique. The result is an amazing colorful loose shirt that can be worn as a tunic but also as a dress! Grab your markers and let the magic begin!


Step 1
Once you have your "canvas", you will need some markers. I used my Letraset Pantone in various colors. Next the most important is the alcohol that will give the artistic tie-dye effect. Some rubber bands, also. You will see why…


Step 2
Place the fabric on a plastic cup or small vase and secure with the rubber band. Make some random designs on it.

 
Step 3
Once you have your design, spill with attention small amount of the alcohol. That's the magic moment. You will see the colors mixing into amazing shapes. To see the final result you can use a hairdryer if you are impatient like me...


Step 4
To complete the new look of my shirt, I added some studs only in the collar. After a couple of minutes my new shirt-dress was ready and fabulous!


 Try it and you will say "No" to boring shirts!

Good Luck
MikaLina


Saturday, March 30, 2013

Bleach the stars!


A DIY all stars sneakers transformation you will love! 


This was my old favorite pair of All Stars in classic black color. Through the years they started to get that vintage look…but I wanted more. More fashion, more color, more sparkle…So I decided to "play" with some studs, bleach detergent and color…

So girls, instead of looking at the stars…you can make them rock and bleached!


Photo 1
This was the initial look of my shoes...

Photo 2
I bought some studs from my local H&M store but you can find them also online.


Photo 3
You will need a bleach detergent, an old paint brush and some colors. I used acrylic paint colors.

Photo 4

With my paintbrush I made random strokes on the shoes with the bleach detergent.


Photo 5

To get faster results I used a hairdryer for 2 minutes and the change of fabric color started to appear.


Photo 6 - 7
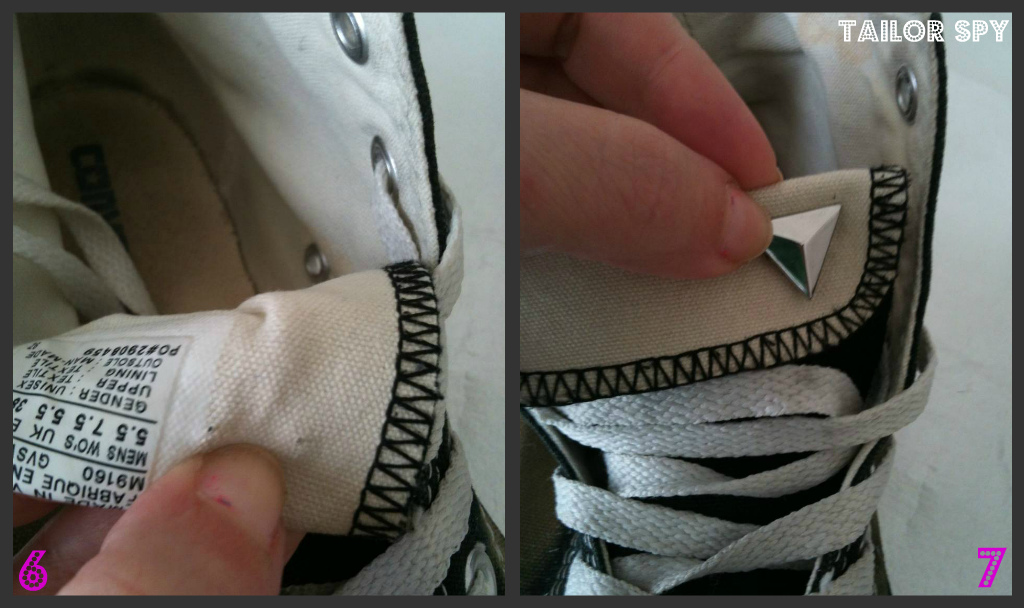
It is really easy to place the studs. You will need a pliar to secure the back sharp angle. It takes only one minute.

Photo 8

Tap the paint and make some paint splashes. I chose a bright blue colour but you can choose the one you prefer.


Photo 9

The final result!! I love the combination of the rock chic and militaire look! So grab your old All Stars and transform them into unique handmade shoes!


Good luck!

xxx
MikaLina