Friday, October 11, 2013

DIY: classy mini wallet-clutch!


Except my passion for jewelry, I must admit I am also a wallet addict! For the days that you want to go shopping without carrying a bag that is heavy and not practical, the mini clutch that I will show you, will give you style and comfort. You can carry your phone, your keys and only the absolute necessary things that you need. Follow the simple instructions to make your own now!!

Pic 1
You will need:
Fake leather fabric
Studs, tassels
Scissors
Paper
Ruler 
Picture 2


Picture 3
Pic 2-3
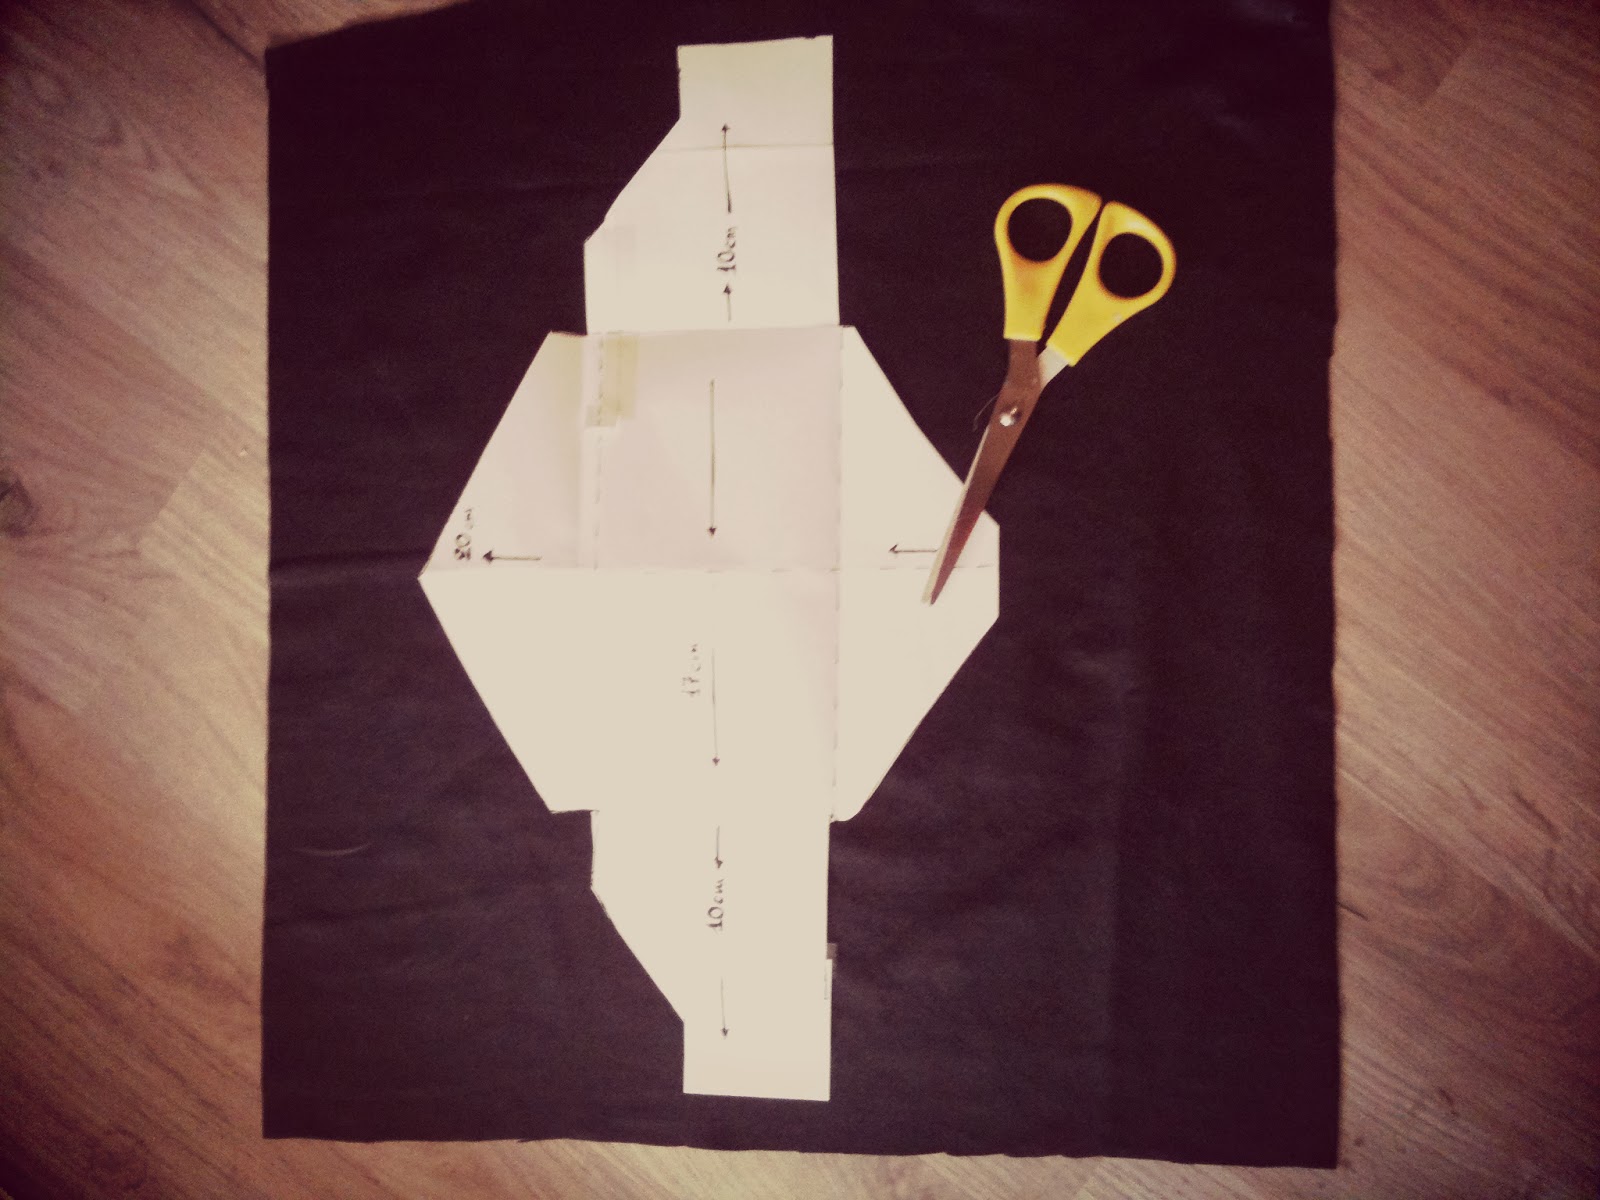
Take a paper and start by making your pattern. The idea is a basic envelope. Measure with your ruler the distance of every point and you will create an open paper envelope. Wrap it to check if the shape is OK.
Picture 4
Picture 5
Pic 4-5
Place the fabric on a steady surface and start cutting the shape of the pattern

Picture 6
Pic 6
Now starts the fun part. With the studs and pliers start decorating your wallet .Close the central button-stud with pliers and if you want you can add some fabric glue in the inner joints.


Pic 7
Ready! I have made also another one with the same technique and pattern. If you want to make them bigger you can just adjust the size of the pattern in a bigger scale! Super easy and fun this wallet is everything you need for a relaxed shopping day!

xxx
MikaLina

Tuesday, September 24, 2013

Autumn rose ring!

Happy Autumn to everyone! We are back with more DIY projects you will love! Stay tuned...


A breezy afternoon at my beach house watching the autumn leaves falling from the trees, I immediately started collecting my materials from things that was already in the house and with a few simple stuff and imagination I created this simple and chic rose ring..!
Let's start!


Photo 1
What you need: 
Pliers
Scissors
Ribbons
Candle
Beads
Wire
Silicone gun (hot glue)

Photos 2-3-4
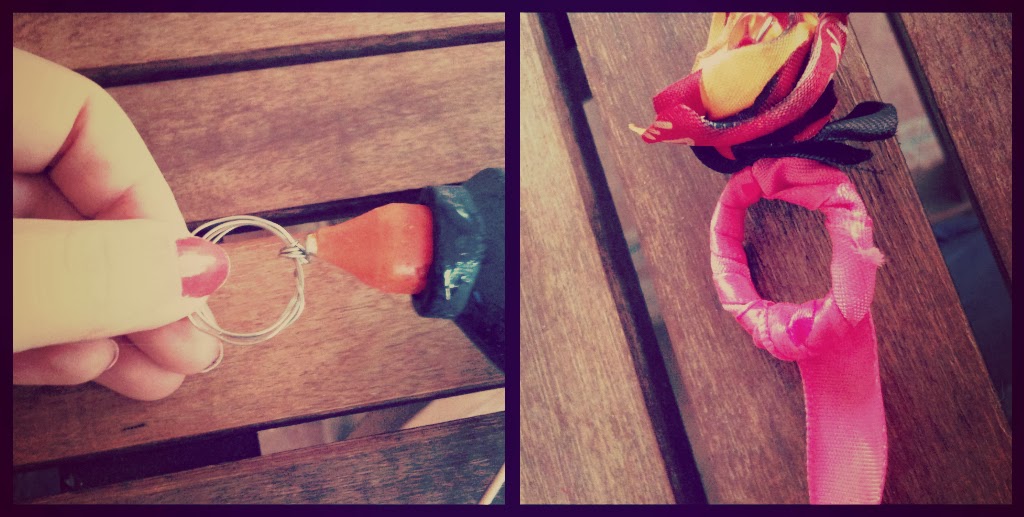
Measure your finger by passing the wire around 4-5 times. Secure the end by making a knot using your pliers.


Photos 5-6-7
Cut in the shape of a flower petal various ribbons in any colors you like. Light your candle and gently pass the edges through the flame. Attention! only the perimeter! At the end the petals will have a 3D like effect.


Photos 8-9
Cut some more wire and start passing through your petals. Once you have placed them all, secure the end with a bead


Photos 10-11
Use the hot glue gun and spread the glue around the base of your ring. Fold around the ribbon (i chose pink for contrast) and gently press to secure the edges. Add a big drop of glue and at the same time "tie" the flower with extra wire.
I combined it with my favorite Berschka rings for a more dramatic look and wore it with my jeans and a white top. With this technique you can also create flowers for many different occasions. As hair accessories and even as a pin for your dresses and tops!

Good luck!

xxx
Mikalina